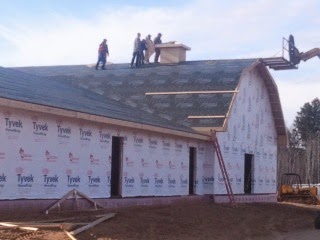
What is a barn without a cupola? Boring, and that won’t do at Camp Daniel, so after checking out pricing for pre-made cupolas, Little Tony set out to build his own. He found out the basic sizing information online, and decided on 42” square for the base. They don’t look that big once on the building! By the time he had bracing inside, siding on top of the chip board, and the hip roof, it was very heavy. Tony and the guys used the extending boom forklift that we had for the weekend to get it up there. It still took a group to get it into place.
Jen got them to stop for a minute to pose for a photo. Nick is probably inside it to attach it. I’m not sure why the tallest guy there got that job....
Tony knew that the cupola needed to be complete before the roofing went on, because after that, the roof will be very slippery, and difficult to paint. For months, Karol and Tony had been studied each barn they passed on the road, in hopes of replicating the distressed barn board look. Karol worked on a sample board to come up with a 4 step paint process to achieve a worn and weathered barn look. The black squares are the background for fake vents.
Above you can see the paint steps involved in the trim. We started with plain 1x4 dimensional lumber. It was then painted a solid background color. Then two coats of dry brushing, in two shades of brown was added. Finally a dry brush technique gave us the white paint that is more solid in some areas, and almost all the way faded and chipped off in others.
Even the vents were expensive to buy, at $100 a piece, so Little Tony, and the Mandich brothers made these from scratch. After the paint job, they look like they’ve been around a while.
Finally, the “rusted” (really just spray paint) metal top and weathervane were added as the finishing touch. Now we are ready for the roof!


No comments:
Post a Comment